Haier HLP24E Use and Care Manual
Browse online or download Use and Care Manual for Washing machines Haier HLP24E. Haier HLP24E Use and Care Manual User Manual
- Page / 70
- Table of contents
- TROUBLESHOOTING
- BOOKMARKS
- User Manual 1
- Guide de l’utilisateur 1
- Manual del usuario 1
- TABLE OF CONTENTS 3
- IMPORTANT SAFETY INSTRUCTIONS 4
- SAVE THESE INSTRUCTIONS 5
- PARTS AND FEATURES 6
- INSTALLATION INSTRUCTIONS 7
- DRAIN SYSTEM REQUIREMENTS 8
- ELECTRICAL REQUIREMENTS 9
- STEP BY STEP INSTRUCTIONS 10
- STEP 4 - LEVEL THE WASHER 13
- CONTROL PANEL AND FEATURES 14
- DELAY START BUTTON 15
- START/PAUSE BUTTON 15
- POWER BUTTON 15
- CYCLE GUIDE 16
- OPERATING INSTRUCTIONS 17
- ADD DETERGENT 18
- STEP 3 - LOAD THE WASHER 19
- STEP 4 - START THE WASHER 19
- CARE AND CLEANING GUIDE 20
- VACATIONING PRECAUTIONS 21
- MOVING OR STORAGE PREPARATION 21
- TROUBLESHOOTING 22
- WASHER IS MAKING NOISE 23
- PROBLEMS WITH CLOTHING 23
- LIMITED WARRANTY 24
- TABLE DES MATIÈRES 25
- AVERTISSEMENT 26
- CONSERVER CES INSTRUCTIONS 27
- PIÈCES ET CARACTÉRISTIQUES 28
- DIMENSIONS DE LA LAVEUSE 30
- TABLEAU DE COMMANDE 36
- BOUTONS DE RÉGLAGE 37
- GUIDE DES PROGRAMMES 38
- INSTRUCTIONS D’UTILISATION 39
- AJOUT DE DÉTERGENT 40
- ENTREPOSAGE 43
- DÉPANNAGE 44
- LA LAVEUSE FAIT DU BRUIT 45
- GARANTIE LIMITÉE 46
- INFORMACIÓN A TENER EN CUENTA 47
- ADVERTENCIA 48
- GUARDE ESTAS INSTRUCCIONES 49
- PIEZAS Y CARACTERÍSTICAS 50
- DIMENSIONES DE LA LAVADORA 52
- PASO 4 – NIVELE LA LAVADORA 57
- PANEL DE CONTROL 58
- GUÍA DE CICLOS 60
- PREPARE LAS PRENDAS 61
- SEPARE LAS PRENDAS 61
- CUIDADO DE LAS TELAS 62
- PASO 3 – CARGUE LA LAVADORA 63
- SOLUCIÓN DE PROBLEMAS 66
- LA LAVADORA HACE RUIDO 67
- PROBLEMAS CON LA ROPA 67
- GARANTÍA LIMITADA 68
- IMPORTANT 70
- IMPORTANTE 70
Summary of Contents
Top-Load Compact Clothes WasherLaveuse compacte à chargement par le hautLavadora compacta de carga superiorUser ManualGuide de l’utilisateurManual del
8STEP BY STEP INSTRUCTIONSINSTALLING YOUR WASHERWerecommendthatyournewwasherbeinstalledbyaqualiedappliancetechnician. If you feel that yo
9STEP 2 - CONNECT AND SECURE THE DRAIN HOSE1. Enlarge the opening by squeezing the ends of the drain hose clamp together. Slide the clamp over the
102. Thread the inlet hose onto the water faucet by hand until snug. Then using pliers, tighten an additional two-thirds turn.IMPORTANT: To avoid da
11STEP 4 - LEVEL THE WASHERIMPORTANT: Proper leveling of the washer will help reduce noise and vibration.1. Placewasherinitsnallocation.Check
12CONTROL PANEL AND FEATURESCONTROL PANEL WASH CYCLE BUTTON Use this button to select the desired cycle for your wash load. The standard defa
13 DELAY START BUTTON Press this button to delay the start of your wash cycle between 1 - 24 hours in one hour increments. Use this button to
14CYCLE GUIDENOTE: To protect your wash load, all options and settings are not available for all cycles. The shaded boxes indicate the default setting
15OPERATING INSTRUCTIONSSTEP 1 - PREPARE AND SORT LAUNDRYPREPARE LAUNDRY Check garment labels for manufacturer’s washing instructions. Empty pock
16STEP 2 - ADD FABRIC CARE PRODUCTSADD DETERGENT You may use either liquid or powder detergent in the washer. Follow the detergent use instruction
17NOTE: Bleach should be added to the bleach dispenser at the same time as you add the detergent. Pour measured liquid chlor
18CARE AND CLEANING GUIDEWARNINGAlways unplug your washer to avoid electric shock before cleaning.Ignoring this warning may result in death or injury.
19VACATIONING PRECAUTIONS Turnothewatersupplyfaucet.Thiswilleliminatethepotentialfordamagetoyour home if a water hose ruptures or le
20TROUBLESHOOTINGWASHER DOES NOT OPERATE Check that the power cord is plugged into a grounded 3 prong outlet. Check that the electrical wall rec
21WASHER IS MAKING NOISEThumping Sound: The wash load may be unbalanced. Pause the washer and redistribute items in the wash basket. Rattling or cl
22within the contiguous United States and Canada and where available in Alaska, Hawaii and Puerto Rico.
23TABLE DES MATIÈRESIMPORTANTES INSTRUCTIONS DE SÉCURITÉ ... 24Précautions de sécurité concernant l’ins
24IMPORTANTES INSTRUCTIONS DE SÉCURITÉ AVERTISSEMENTAfin de réduire le risque d’incendie, de choc électrique ou de blessures corporelles lors de l’util
25PRÉCAUTIONS GÉNÉRALES DE SÉCURITÉ• L’espace autour de l’appareil doit être libre de toute matière combustible comme de la charpie, du papier, des
26PIÈCES ET CARACTÉRISTIQUESABCDEFLK MNOHGIJP Couvercle supérieur Tableau de commande Caisse Poignée de la caisse Pieds de nivellement (2) Orice
27INSTRUCTIONS D’INSTALLATIONOUTILS NÉCESSAIRES• Pince• Clé• Tournevis à lame plate• Mètre ruban• NiveauPIÈCES FOURNIES• Bride pour tuyau
1TABLE OF CONTENTSIMPORTANT SAFETY INSTRUCTIONS ... 2Installation Safety Precautions ...
28DIMENSIONS DE LA LAVEUSE 19¹¹⁄₁₆" (50,0 cm) 20¹⁄₁₂"(51,0 cm)35½"(90,2 cm) CRITÈRES DU SYSTÈME DE VIDANGETUYAU RIGIDE DE REJET À L’ÉGO
29ÉVIER DE BUANDERIEL’évier de buanderie doit avoir une capacité minimale de 20 gal. (76 L). La hauteur de l’évier de buanderie doit être de 31” (80
30INSTRUCTIONS ÉTAPE PAR ÉTAPEINSTALLATION DE LA LAVEUSENous recommandons que l’installation de votre nouvelle laveuse soit réalisée par un technicien
31 AVERTISSEMENTAfin d’éviter tout risque d’étouffement, conserver le sac en plastique et autres matériaux d’emballage hors de portée des bébés et des e
322. Enler le tuyau d’arrivée d’eau sur le robinet d’arrivée d’eau à la main jusqu’à obtenir un ajustement serré. Serrer ensuite les raccords en e
33ÉTAPE 4 – NIVELLEMENT DE LA LAVEUSEIMPORTANT : Un bon aplomb de la laveuse permet de réduire les vibrations et bruits éventuels.1. Placer la laveus
34TABLEAU DE COMMANDE ET FONCTIONSTABLEAU DE COMMANDE BOUTON WASH CYCLE (PROGRAMME DE LAVAGE) • Utiliser ce bouton pour sélectionner le programme
35 BOUTONS DE RÉGLAGEBouton Water Level (niveau d’eau)• Utiliser ce bouton pour choisir le niveau d’eau adapté à la charge. Small (bas) est le ni
36GUIDE DES PROGRAMMESREMARQUE: Pour protéger la charge de lavage, tous les options et réglages ne sont pas disponibles pour tous les programmes. Les
37INSTRUCTIONS D’UTILISATIONÉTAPE 1 – PRÉPARATION ET TRI DU LINGEPRÉPARATION DU LINGE• Consulter les étiquettes de vêtement du fabricant pour les ins
2IMPORTANT SAFETY INSTRUCTIONS WARNINGTo reduce the risk of fire, electric shock, or injury to persons when using your appliance, follow the basic pre
38ÉTAPE 2 – AJOUT DE PRODUITS DE SOIN DES TISSUSAJOUT DE DÉTERGENT• Vous pouvez utiliser aussi bien du détergent liquide que du détergent en poudre
39AJOUT D’AGENT DE BLANCHIMENT (SI DÉSIRÉ)REMARQUE: L’agent de blanchiment doit être ajouté dans le distributeur d’agent de blanchiment au même momen
40GUIDE D’ENTRETIEN ET DE NETTOYAGEAVERTISSEMENTTo ujours débrancher la laveuse avant d’éviter tout choc électrique avant le nettoyage.Le non-respect
41PRÉCAUTIONS À PRENDRE AVANT UN DÉPART• Fermer le robinet d’arrivée d’eau. Ceci permettra d’éviter d’endommager votre domicile en cas de rupture ou
42DÉPANNAGELA LAVEUSE NE FONCTIONNE PAS• Vérier que le cordon d’alimentation est branché sur une prise de courant à 3 alvéoles reliée à la terre.•
43LA LAVEUSE FAIT DU BRUITBruit saccadé :• La charge de lavage est peut-être déséquilibrée. Suspendre le programme de la laveuse et ré-agencer les a
44 GARANTIE LIMITÉESERVICE À DOMICILE GARANTIE COMPLÈTE DE UN ANPendant 12 mois à compter de la date d’achat d’origine, Haier réparera ou remplacera g
45ÍNDICEINSTRUCCIONES IMPORTANTES DE SEGURIDAD ... 46Precauciones de seguridad para la instalación ...
46INSTRUCCIONES IMPORTANTES DE SEGURIDAD ADVERTENCIAA fin de reducir el riesgo de incendio, choque eléctrico o de daño a las personas cuando usen el ap
47PRECAUCIONES GENERALES RELATIVAS A LA SEGURIDAD• Mantenga el área alrededor del aparato libre de materiales combustibles, tales como pelusa, pape
3GENERAL SAFETY PRECAUTIONS Keep the area around your appliance free from combustible materials such as lint, paper, rags or chemicals. Close s
48PIEZAS Y CARACTERÍSTICASABCDEFLK MNOHGIJP Tapa superior Panel de control Carcasa Manija del armario Patas niveladoras (2) Conducto de desagüe
49INSTRUCCIONES DE INSTALACIÓNHERRAMIENTAS NECESARIAS• Alicates• Llave de tuercas• Destornillador de hoja plana• Cinta de medir• Nivel de ca
50DIMENSIONES DE LA LAVADORA 19¹¹⁄₁₆" (50,0 cm) 20¹⁄₁₂"(51,0 cm)35½"(90,2 cm) REQUISITOS DEL SISTEMA DE DESAGÜETUBO VERTICAL DE PARED O
51TINA DE LAVADEROLa tina de lavadero necesita una capacidad mínima de 20 gal (76 L). La tina de lavadero deberá tener una altura de por lo menos 31”
52INSTRUCCIONES PASO A PASOINSTALACIÓN DE LA LAVADORASe recomienda que un técnico de aparatos competente instale su nueva lavadora. Si le parece que t
53 ADVERTENCIAPara evitar el peligro de asfixia, mantenga la bolsa de plástico y otros materiales de envío lejos del alcance de los bebés y los niños.
542. Enrosque a mano la manguera de entrada dentro del grifo de agua hasta que quede ajustado. Luego apriete con pinzas dos tercios de vuelta adicio
55PASO 4 – NIVELE LA LAVADORAIMPORTANTE: La nivelación apropiada de su lavadora ayudará a reducir el ruido y la vibración.1. Coloque la lavadora en s
56PANEL DE CONTROL Y CARACTERÍSTICASPANEL DE CONTROL BOTÓN WASH CYCLE (CICLO DE LAVADO) • Use este botón para seleccionar el ciclo deseado para s
57 BOTONES DE AJUSTEBotón Water Level (Nivel de agua)• Use este botón para seleccionar un nivel de agua adecuado para la carga. El ajuste Small (
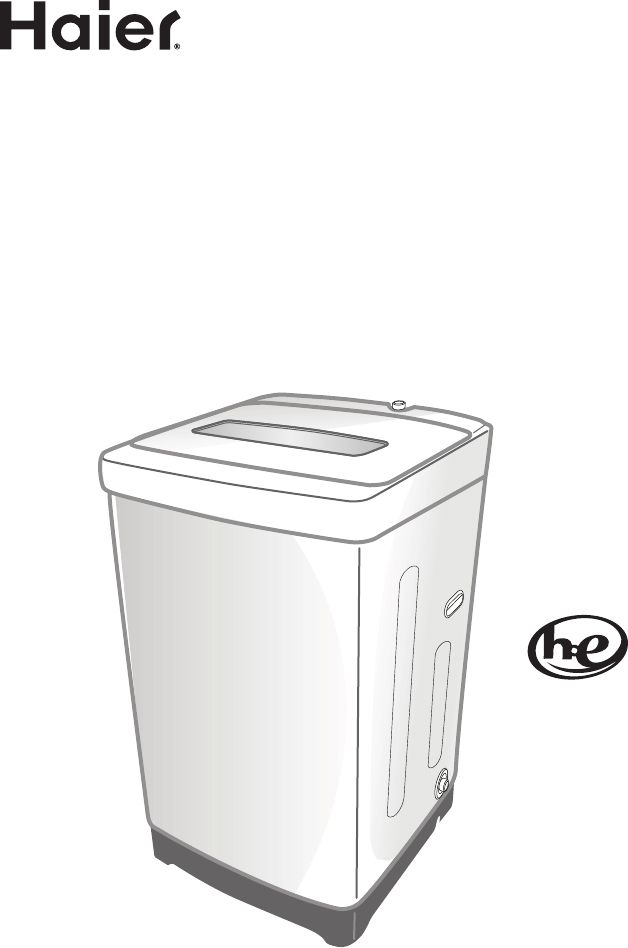
4PARTS AND FEATURESABCDEFLK MNOHGIJP Top Lid Control Panel Cabinet Cabinet Handle Leveling Feet (2) Drain Port Power Cord (120 Volt/ 60 Hz) Acc
58GUÍA DE CICLOSNOTA: Para proteger su carga de lavado, no todas las opciones y ajustes estarán disponibles para todos los ciclos. Las cajas sombreada
59INSTRUCCIONES DE FUNCIONAMIENTOPASO 1 – PREPARE Y SEPARE LAS PRENDASPREPARE LAS PRENDAS• Revise las etiquetas de las prendas para ver las instrucci
60PASO 2 – AGREGUE LOS PRODUCTOS PARA EL CUIDADO DE LAS TELASAGREGUE DETERGENTE • Puede usar detergente líquido o en polvo con esta lavadora. Siga
61AGREGUE BLANQUEADOR (SI LO DESEA)NOTA: Debe agregarse blanqueador en el depósito del blanqueador al mismo tiempo que agrega el detergente.• Vierta
62GUÍA PARA EL CUIDADO Y LA LIMPIEZAADVERTENCIASiempre desenchufe la lavadora para evitar un choque eléctrico antes de la limpieza.El ignorar esta adv
63PRECAUCIONES AL IRSE DE VACACIONES• Cierre el grifo de suministro de agua. Esto eliminará la posibilidad de daños a su hogar si hay rupturas o fug
64SOLUCIÓN DE PROBLEMASLA LAVADORA NO FUNCIONA• Verique que el cable eléctrico esté enchufado en un contacto de pared de conexión a tierra de 3 term
65LA LAVADORA HACE RUIDOSonido de golpeteo:• Es posible que la carga de lavado esté desequilibrada. Haga una pausa en la lavadora y vuelva a distribu
66 GARANTÍA LIMITADASERVICIO EN EL HOGARGARANTÍA COMPLETA POR UN AÑODurante 12 meses a partir de la fecha de compra original en la tienda, Haier repar
5INSTALLATION INSTRUCTIONSTOOLS NEEDED Pliers Wrench Flat-blade Screwdriver Measuring Tape Carpenter’s LevelPARTS SUPPLIED Drain
IMPORTANTDo Not Return This Product To The StoreIf you have a problem with this product, please contact the “Haier Customer Satisfaction Center” at1-
6WASHER DIMENSIONS 19¹¹⁄₁₆" (50.0 cm) 20¹⁄₁₂"(51.0 cm)35½"(90.2 cm) DRAIN SYSTEM REQUIREMENTSWALL OR FLOOR STANDPIPEThe height of the s
7LAUNDRY TUBThe laundry tub must have a minimum capacity of 20 gal. (76 L). The height of the laundry tub must be at least 31½” (80 cm) and no more th
Related products and manuals for Washing machines Haier HLP24E


 (120 pages)
© 2020, manymanuals.com. All rights reserved. | 0.912 s |
 Manymanuals.com
 Manymanuals.de
 Manymanuals.fr
 Manymanuals.it
 Manymanuals.pl
 Manymanuals.cz
 Manymanuals.es
 Manymanuals-pt.com
Comments to this Manuals